Why Youth Softball Hitting Mechanics Matter
You crush it off the tee. Soft toss? No problem. Then a live pitcher steps in, and everything falls apart.
This is the most common problem in youth softball hitting, and it has nothing to do with effort. It has everything to do with mechanics that haven’t been built to hold up at game speed.
This guide is written directly to you, the player. Not your coach. Not your parents. You. Every section gives you a checkpoint you can feel, a flaw you can name, and a fix you can train. Whether you’re 10U or 14U, the goal is the same: build a swing that works when the game is on the line.
What Are Good Youth Softball Hitting Mechanics?
Good youth softball hitting mechanics start with a balanced, athletic stance and relaxed grip. From there, a controlled load shifts your center of mass to your back side, your stride lands you in a firm, balanced launch position, and a connected turn through the kinetic chain — pelvis, then torso, then arms, then hands, then bat — drives the barrel through the zone.
Contact happens out front with the barrel on plane. Extension follows through the ball, not around it. The finish is balanced and under control.
The part most guides skip: none of that holds up at game speed unless you train it that way. A swing that looks great on a tee and breaks down against a live pitcher is a timing problem and a mechanics problem at the same time. This guide covers both.
The Youth Softball Swing, Step by Step
A. Setup, Grip, and Stance
Start here: if your setup is off, everything after it is harder to fix.
Stance and base:
– Feet just outside shoulder width, toes pointed slightly outward
– Knees bent, hips loaded back and down. Not just knees bent, but your whole center of mass in an athletic position
– Weight distributed 50/50 at setup, with the ability to load quickly without losing balance
– Enough plate coverage so you can reach an outside pitch without reaching for it
Grip:
– Hold the bat in your fingers, not your palm. A palm grip kills bat speed before the swing starts
– Line up your door-knocking knuckles (middle knuckle row) on both hands
– Keep your grip relaxed at setup; squeezing tightens your forearms and slows the barrel
Bat fit:
If your bat is too long or too heavy, it controls you instead of the other way around. A bat that’s too heavy drops the barrel before contact, creates a Barrel Dump flaw, and trains bad mechanics into your muscle memory. A common benchmark: if you can’t hold the bat at arm’s length horizontally for 10 seconds, it’s too heavy for game-speed mechanics work.
What to feel:
Comfortable. Ready. Like you could take a step in any direction. If you feel rigid or stuck, reset your base before the pitch arrives.
B. Load, Stride, and Launch Position
This is where most youth softball hitters break down, and where most guides give the least useful explanation. Here’s exactly what the Load Phase and Stride Phase should feel like.
The Load Phase:
As the pitcher begins their motion, shift your center of mass slightly toward your back hip. This is a small, controlled move, not a sway back and not a rock. Think “back pocket down the line”: your back hip drives back and slightly down. Your hands move slightly inward toward your back shoulder. Your front shoulder closes slightly without your whole upper body collapsing in.
What to avoid in the Load Phase:
– Sway: drifting your center of mass past your back foot, this kills power and timing
– Gate Swing: letting your front knee drift outward during the load instead of staying over the ball of your foot
The Stride Phase:
Your stride is a timing move, not a power move. Land on the ball of your front foot, softly. Keep your center of mass back until the ball is committed. Your stride foot lands closed or slightly open, not flying open. A closed landing keeps hip-shoulder separation loaded for the swing.
The most common mistake here is Drifting. Your center of mass moves forward toward the pitcher before your hips fire. Drifting bleeds the power out of your kinetic chain before the swing starts. Cue: “Land firm, turn behind your front hip.”
Launch Position checkpoints:
– Weight still back, front foot planted
– Hands back near your rear shoulder, not drifting forward with your stride
– Hip-shoulder separation is loaded, your front hip is closed while your shoulders are squared or slightly open
– Eyes level on the pitch
Against live pitching:
Rushing is the single most common cause of tee mechanics breaking down in a game. The fix is not slowing down your swing, it’s being “slow and early” into your stride so your launch position is set before your hips fire.
C. Turn, Contact, Extension, and Finish
The Swing Phase is where power is created or lost. The kinetic chain fires in one direction only: Pelvis → Torso → Arms → Hands → Bat. Skip a link and you lose bat speed.
Hip-shoulder separation and the turn:
Your pelvis fires first. Front hip pulls back and through, back hip drives forward. Your torso follows a split second later. That delay is hip-shoulder separation, and it’s where power is stored and released. Hitters who spin everything at once lose the energy transfer that makes elite swings fast.
Hands and barrel path:
Your hands stay connected to your turning torso through the hitting zone. The barrel stays on plane, matching the angle of the incoming pitch for as long as possible. This is On-Plane Efficiency (OPE), and 70%+ OPE is the benchmark for efficient contact. A short, connected path to the ball (“short to it, long through it”) creates more on-plane contact chances per swing than any looping path.
Contact and extension:
Contact happens out front of your body. After contact, drive the barrel through the ball, not around it. Extension creates carry and backspin. Early Extension (hips firing out toward the catcher before your hands fire) is one of the most common swing killers in youth hitters and shows up as weak pulled contact or pitches jammed on the hands.
The finish:
A balanced finish is your tell. If you’re falling off the ball, spinning off your back foot, or catching yourself with your front foot, your center of mass was wrong at launch or your torso fired early. A controlled finish with weight over your front hip and your hands above your back shoulder is what a connected swing looks like at the end.
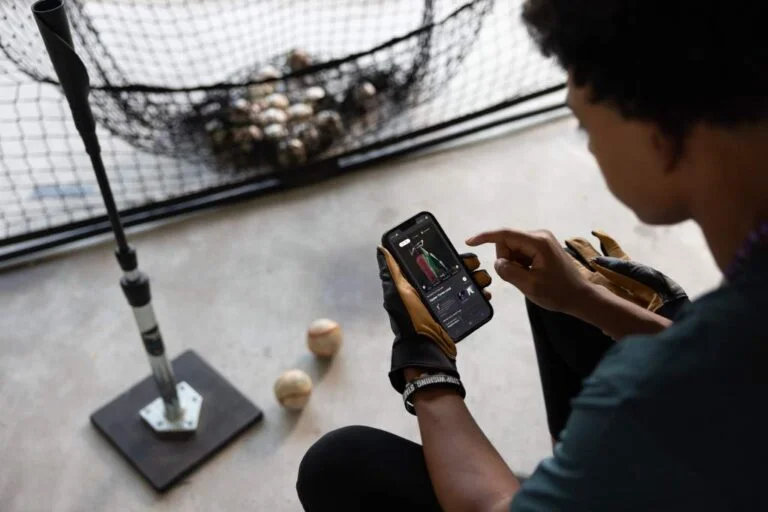
Ready to see what your swing is actually doing?
GET STARTED WITH WIN REALITY. Upload your swing video to SwingAI and get instant AI biomechanics feedback on your Load, Launch, and Contact position.
How to Diagnose and Improve Your Swing
Method 1: Phone Video Checkpoints
You don’t need expensive equipment to see your swing clearly. A phone on a tripod and two camera angles will show you more than 10 rounds of batting practice by feel.
Set up two camera angles:
- Side view (direct side, level with your waist): Shows load depth, stride length, launch position, hand path, and extension.
- Open-side view (45 degrees from the front, catcher’s side): Shows hip-shoulder separation, barrel angle at contact, and finish balance.
What to check by phase:
Setup/Stance: Is your base wide enough for plate coverage? Are your hands relaxed and back near your rear shoulder? Is your bat angle at 45 degrees or close to vertical?
Load: Does your center of mass shift toward your back hip without swaying past your back foot? Are your hands moving in, not forward?
Launch Position: Is your front foot landing with your center of mass still back? Is there visible hip-shoulder separation before your hands move?
Contact: Is the barrel meeting the ball out in front of your body? Are your hips clearing before your hands fire?
Finish: Are you balanced over your front hip? Is the bat above your back shoulder at finish?
Film 10 swings per session. Review in slow motion. Look for the same flaw across multiple reps — one bad rep is noise, three or more is a pattern.
Method 2: Ball-Flight Diagnosis
Where the ball goes tells you what your swing did. Use this symptom guide to connect contact quality to a specific mechanical problem.
| Ball Flight | What It Tells You | Likely Flaw |
|---|---|---|
| Consistent late contact, ball hit off the handle or to the pull side weak | Timing is late; stride or launch is rushed | Drifting or early forward move |
| Pop-ups to the pull side | Barrel is under the ball at contact; upper cut from a low launch | Barrel Dump at launch |
| Weak grounders and rollovers to the pull side | Hands rolling over at contact, bat finishing below the ball | Casting or early hand release |
| Swing-and-miss under the pitch | Barrel dropping below the zone; bat not on plane | Barrel Dump, low OPE |
| Consistently jammed, ball hit off the label or hands | Contact too deep in the zone | Drifting forward, contact not out front |
| Hard contact to the opposite field only | Swing is late but mechanically sound | Timing only — load and launch too late |
Use this chart after every live session. Identifying one pattern across 5+ at-bats points you toward one specific fix instead of overloading your mechanics checklist.
Method 3: Tee-to-Live Pitch Progression
If your tee swing is good and your game swing falls apart, you don’t have a swing problem — you have a transfer problem. Build from controlled environments toward game speed with purpose.
Step 1: Tee work. Focus on launch position and contact. Use the Stop at Contact Drill — pause at contact every rep to feel where the barrel is, where your center of mass is, and whether your hips cleared. Do this for 20 reps before any full swings.
Step 2: Front toss. Front toss at 30–40 feet forces you to time the ball without the complexity of pitch location variety. Use 3-second intervals between tosses so you can reset your load without rushing.
Step 3: Machine work. Set the machine to a speed slightly above your comfort zone — not maximum. Focus on “slow and early” into your stride. If your mechanics break down at machine speed, step velocity back 5 mph and build again.
Step 4: Live pitching with decision-making. Add a take-or-swing decision on every pitch. Work count-based scenarios: 0-0 (look for your pitch), 0-2 (protect and battle), 3-1 (hunt fastball in your zone).
Don’t rush from tee to live. Each step earns the next one by proving your mechanics are repeatable, not just possible.
How WIN Reality Helps
Every checkpoint in this guide is something you can train manually. SwingAI makes that process faster, more objective, and more measurable.
SwingAI is WIN Reality’s AI swing analysis app. Upload a swing video from your phone, and the AI breaks down your biomechanics across the key dimensions of your swing — giving you specific, actionable feedback on what you’re doing and what to fix first.
For youth softball hitters, this matters for three specific reasons:
1. Removes guesswork from self-coaching. Most players think they know what their swing is doing. SwingAI identifies flaws like Drifting, Barrel Dump, or Early Extension that are invisible to feel and hard to catch in real-time video without knowing what to look for.
2. Gives you a priority order. If you have three mechanical issues, fixing them in the wrong order slows your development. SwingAI surfaces the highest-priority fix first — the one that creates the most downstream improvement — so your reps are targeted, not random.
3. Tracks your progress over time. Upload a swing, fix the flaw, upload again. Progress tracking shows whether the movement pattern changed between sessions, not just whether your exit velocity went up. That’s the difference between getting lucky in a game and building a repeatable swing.
How to use it:
- Upload a side-view swing video from your most recent tee, front toss, or machine session
- Review the AI feedback on your biomechanics checkpoints
- Take the top priority fix into your next practice with a specific drill
- Re-upload after 3–5 sessions to measure change
SwingAI works on its own as a standalone subscription. To pair AI swing feedback with game-speed live pitching reps at home, the Ultimate Hitter Pack bundles SwingAI with TrainVR — WIN Reality’s Meta Quest VR hitting simulator.
For more on building your full training plan around live pitching preparation, visit WIN Reality’s softball training resources.
Build a Better Game Swing with SwingAI
You now have the checkpoints, the flaw names, the ball-flight diagnostic, and the progression to take your swing from the tee to live pitching. The next step is seeing exactly what your swing is doing right now.
Upload your swing to SwingAI, get your AI biomechanics breakdown, and take one fix into your next practice.